בפרוייקט זה נחבר כ 24 מצלמות וואפי פי ישירות לרשת שלנו של הבינה מלאכותית וניתן לה ללמוד
Tp-link Tapo TC65 Outdoor Security Wi-Fi Camera Purchase
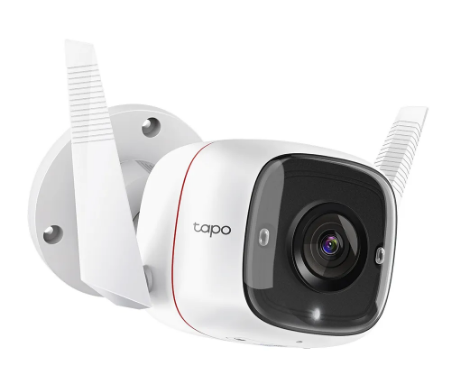 This summer, we decided it was time to look again at putting an external camera on our roof to use on the Virtual Swanage website. After looking at various options, we ordered a tp-link TC65 Outdoor Security Wi-Fi Camera, which cost £45.
The camera specifications are:
| Sensor | |
| Image Sensor | 1/2.7 " |
| Resolution | 3 MP (2304 × 1296) |
| Lens | F/NO: 2.2; Focal Length: 3.89mm |
| Night Vision | 850 nm IR LED up to 98 ft (30m) |
| Video | |
| Frame Rate | 15fps |
| Video Streaming | 3MP |
| Video Compression | H.264 |
| Network | |
| Security | 128 bit AES encryption with SSL/TLS |
| Wireless Rate | 11Mbps(802.11b) |
| 54Mbps(802.11g) | |
| 150Mbps(802.11n) | |
| Frequency | 2.4 GHz |
| Wireless Security | WPA/WPA2-PSK |
The camera does not have the option to upload an image directly to our server but supports the Real Time Streaming Protocol (RTSP), which allows the capture of the video stream by another device on the network.
The camera has connections for power and an RJ45 network connection. We do not want to connect another network device on the roof after the lightning strike a few years ago, which destroyed all of our networked devices and computers.
We mounted the new camera to the bracket which holds our TV antenna, and the power cable is routed into the loft space via one of the window frames. This goes into the supplied PSU adapter to power the camera.
Setting up the Tapo Camera for RTSP streaming
To use the RTSP protocol, you must set a username and password in the camera and find its IP address.
The camera uses the following URL format to access the video stream:
rtsp://username:password@IP-Address/stream1
Your internet router assigns the camera's IP address; you can find it on your router's DHCP list or in the Tapo app.
Finding the IP address in the Tapo app
- On the app's home page, select your camera model/name.
- Tap the settings icon (cog) at the top-right of the app.
- Tap the camera name at the top of the Camera Settings screen.
- The network settings will be shown, including the IP address and MAC address of the device.
Setting the username and password
- On the app's home page, select your camera model/name.
- Tap the settings icon (cog) at the top-right of the app.
- Tap Advanced Settings, then select Device Account
- Enter your new username and password and save.
Capturing the Images

We have a small Linux server running 24/7 in our network cupboard, and with help from Chat GPT, we created a Python script to access the video feed via its RTSP URL and OpenCV.
OpenCV is a library of programming functions mainly for real-time computer vision and processing.
The Python script uses a threading timer to capture a new frame every 30 seconds.
The capture function first opens the video stream and captures the current frame. If this succeeds, it crops the image to a 1920 x 1080 size.
There are windows visible in the houses directly in front of the camera, which are blurred using the GaussianBlur function in OpenCV.
The image is then saved to a folder on the server with a timestamp, and a separate script uploads the latest image to the server every 30 seconds.
In the future if our internet provider decides to upgrade us to fibre broadband we will look at setting up a video stream and upgrading to a better quality 4K camera.
|
1 2 3 4 5 6 7 8 9 10 11 12 13 14 15 16 17 18 19 20 21 22 23 24 25 26 27 28 29 30 31 32 33 34 35 36 37 38 39 40 41 42 43 44 45 46 47 48 49 50 51 52 53 54 55 56 57 58 59 60 61 62 63 64 65 66 67 68 69 70 71 72 73 74 75 76 77 78 79 80 81 82 83 84 85 86 87 88 89 90 91 92 93 94 95 96 97 98 99 100 101 102 103 104 105 106 107 108 109 110 111 112 113 114 115 116 117 118 119 120 121 122 123 124 125 126 127 128 129 |
#!/usr/bin/python3 from __future__ import absolute_import, division, print_function, \ unicode_literals import time import datetime as dt import os import cv2 import traceback import threading # Example usage rtsp_url = "rtsp://username:password@ipaddress/stream1" image_folder = "/home/user/webcam/images" video_folder = "/home/user/webcam/videos" capture_interval = 30 # seconds error_log_file = "/home/user/webcam/webcamerror.log" blur1_x = 0 # X-coordinate of the top-left corner of the blur region blur1_y = 1000 # Y-coordinate of the top-left corner of the blur region blur1_width = 200 # Width of the blur region blur1_height = 80 # Height of the blur region blur2_x = 254 # X-coordinate of the top-left corner of the blur region blur2_y = 936 # Y-coordinate of the top-left corner of the blur region blur2_width = 30 # Width of the blur region blur2_height = 50 # Height of the blur region blur3_x = 519 # X-coordinate of the top-left corner of the blur region blur3_y = 936 # Y-coordinate of the top-left corner of the blur region blur3_width = 52 # Width of the blur region blur3_height = 80 # Height of the blur region blur4_x = 598 # X-coordinate of the top-left corner of the blur region blur4_y = 936 # Y-coordinate of the top-left corner of the blur region blur4_width = 52 # Width of the blur region blur4_height = 80 # Height of the blur region blur5_x = 684 # X-coordinate of the top-left corner of the blur region blur5_y = 936 # Y-coordinate of the top-left corner of the blur region blur5_width = 52 # Width of the blur region blur5_height = 80 # Height of the blur region cap = None def blur_region(frame, x, y, width, height): # Create a region of interest (ROI) for blurring roi = frame[y:y+height, x:x+width] # Apply Gaussian blur to the ROI blurred_roi = cv2.GaussianBlur(roi, (99, 99), 0) # Replace the ROI with the blurred version frame[y:y+height, x:x+width] = blurred_roi return frame def get_image(): print("Opening video stream") cap = cv2.VideoCapture(rtsp_url) # Check if the video stream is opened successfully if cap.isOpened(): # Get the original frame size frame_width = int(cap.get(cv2.CAP_PROP_FRAME_WIDTH)) frame_height = int(cap.get(cv2.CAP_PROP_FRAME_HEIGHT)) # Calculate the crop coordinates crop_x = 0 crop_y = 0 crop_width = min(frame_width, 1920) crop_height = min(frame_height, 1080) # Read the current frame from the video stream ret, frame = cap.read() # Check if the frame was read successfully if ret: # Crop the frame frame = frame[crop_y:crop_y + crop_height, crop_x:crop_x + crop_width] # Blur the specified region of the frame frame = blur_region(frame, blur1_x, blur1_y, blur1_width, blur1_height) frame = blur_region(frame, blur2_x, blur2_y, blur2_width, blur2_height) frame = blur_region(frame, blur3_x, blur3_y, blur3_width, blur3_height) frame = blur_region(frame, blur4_x, blur4_y, blur4_width, blur4_height) frame = blur_region(frame, blur5_x, blur5_y, blur5_width, blur5_height) # Save the frame as a JPEG image timestamp = time.strftime("%Y%m%d%H%M%S") filename = f"{image_folder}/webcam-{timestamp}.jpeg" cv2.imwrite(filename, frame, [cv2.IMWRITE_JPEG_QUALITY, 95]) print(f"Saved frame {filename}") else: print("Error reading frame") cap.release() else: print("Error opening video stream") restart_thread() def restart_thread(): st = threading.Timer(capture_interval, get_image) st.daemon = True st.start() def main(): ''' Main program function ''' global cap get_image() while (True): time.sleep(1) if __name__ == "__main__": main() |