חדש בשכונה
אימון בינה מלאכותית – לראות דרך קירות
https://www.facebook.com/reel/2095486234566653
חלק א : יצירת וידאו מטקסט – שיווק מוצר עם בינה מלאכותית
 pika.art
text to video
יצירת וידאו : מתמונה וטקסט – שיווק מוצר עם בינה מלאכותית

1.תרגיל כיתה
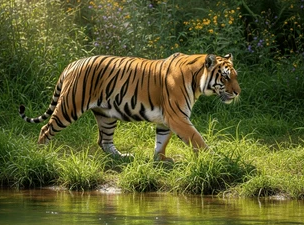
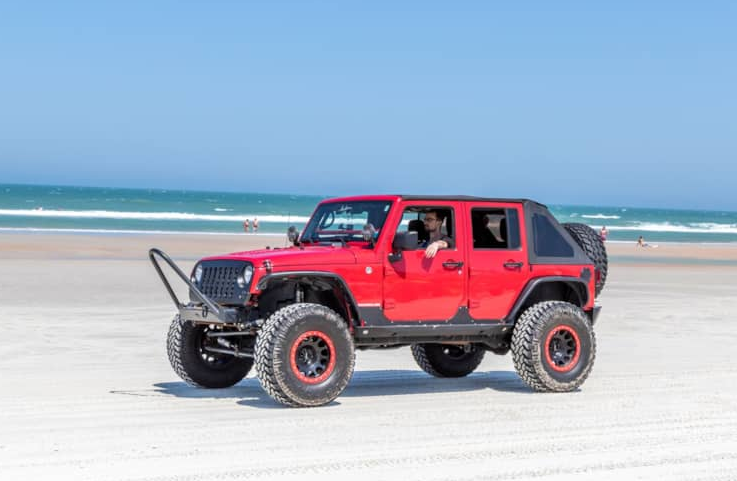
- צור סרטון וידאו לפי רעיון משלך או גיפ נוסע בים או טיגרס הופך לנשר
חלק ב : זיהוי פנים בעזרת בינה מלאכותית


InsightFace: מערכת זיהוי וניתוח פנים מבוססת בינה מלאכותית
מה זה InsightFace?
InsightFace היא ספריית בינה מלאכותית לניתוח פנים בתמונה או וידאו.
היא מאפשרת לבצע כמה פעולות חשובות:
- זיהוי פנים בתמונה
- ציור קופסה סביב כל פנים
- מציאת נקודות פנים
- זיהוי אדם לפי פנים
- יצירת וקטור Face Embedding
- הערכת גיל ומין
- השוואה בין שתי תמונות פנים
- חיפוש אדם בתוך מאגר תמונות
InsightFace לא משתמשת במודל אחד בלבד.
בפועל היא מפעילה כמה תתי־מודלים, כאשר כל תת־מודל אחראי על פעולה אחרת.
לדוגמה:
|
1 2 |
תמונה → זיהוי פנים → נקודות פנים → יישור פנים → embedding → זיהוי אדם |
מה זה FaceAnalysis?
FaceAnalysis היא מחלקה בפייתון שמפעילה את כל תהליך ניתוח הפנים בצורה פשוטה.
במקום להריץ כל מודל בנפרד, כותבים:
|
1 2 3 4 5 6 |
from insightface.app import FaceAnalysis app = FaceAnalysis(name="buffalo_l") app.prepare(ctx_id=-1) faces = app.get(img) |
והספרייה עושה מאחורי הקלעים כמה שלבים:
- מזהה איפה יש פנים בתמונה
- מוצאת נקודות חשובות בפנים
- מכינה את הפנים לזיהוי
- יוצרת embedding
- מחזירה מידע כמו קופסה, ציון ביטחון, גיל, מין ונקודות פנים
מה זה ONNX בתוך InsightFace?
רוב המודלים המוכנים של InsightFace מגיעים כקבצי:
|
1 2 |
.onnx |
ONNX הוא פורמט שמאפשר לשמור מודל AI מוכן ולהריץ אותו עם מנוע שנקרא:
|
1 2 |
ONNX Runtime |
כלומר InsightFace משתמשת במודלים מוכנים, למשל:
|
1 2 3 4 5 6 |
det_10g.onnx w600k_r50.onnx genderage.onnx 2d106det.onnx 1k3d68.onnx |
כל קובץ כזה הוא מודל AI אחר.
תתי־המודלים המרכזיים ב־InsightFace
1. Face Detection Model
זה המודל הראשון שפועל.
המטרה שלו היא למצוא פנים בתוך תמונה.
הקלט:
|
1 2 |
תמונה מלאה |
הפלט:
|
1 2 3 4 |
bbox — קופסה סביב הפנים det_score — רמת ביטחון kps — נקודות בסיסיות של הפנים |
לדוגמה:
|
1 2 |
תמונה → det_10g.onnx → נמצאו 3 פנים |
המודל הנפוץ לזיהוי פנים בחבילות החדשות הוא ממשפחת SCRFD.
שימושים:
- זיהוי פנים בתמונה
- זיהוי פנים ממצלמה בזמן אמת
- ספירת אנשים
- חיתוך פנים מתוך תמונה
- שלב ראשון לפני זיהוי אדם
דוגמה לפלט:
|
1 2 3 |
bbox = [120, 80, 250, 230] score = 0.98 |
המשמעות: נמצאו פנים במיקום הזה בתמונה, עם ביטחון גבוה.
2. Face Landmark Model — נקודות פנים
לאחר שמצאנו פנים, צריך להבין את המבנה שלהן.
מודל Landmark מזהה נקודות חשובות בפנים:
- עיניים
- אף
- פה
- סנטר
- קווי פנים
ב־InsightFace קיימים מודלים כמו:
|
1 2 3 |
2d106det.onnx 1k3d68.onnx |
2D Landmarks
מודל 2D מחזיר נקודות על הפנים במישור התמונה.
לדוגמה:
|
1 2 3 4 5 |
עין שמאל: x,y עין ימין: x,y אף: x,y פה: x,y |
שימושים:
- יישור פנים לפני זיהוי
- ציור נקודות פנים
- ניתוח הבעה בסיסי
- בדיקה אם הפנים פונות קדימה או הצידה
3D Landmarks
מודל 3D מנסה להעריך גם עומק ומבנה תלת־ממדי של הפנים.
שימושים:
- הערכת זווית ראש
- ניתוח תנוחת פנים
- יישור מדויק יותר
- יישומים מתקדמים ב־AR / VR
3. Face Recognition Model
זה אחד המודלים החשובים ביותר ב־InsightFace.
המטרה שלו היא לא רק למצוא פנים, אלא להבין מי האדם.
המודל מקבל פנים חתוכות ומיושרות, ומחזיר וקטור מספרי שנקרא:
|
1 2 |
Face Embedding |
לדוגמה, המודל יכול להחזיר וקטור בגודל 512 מספרים.
|
1 2 |
face image → recognition model → embedding vector |
ה־embedding הוא כמו “טביעת אצבע מתמטית” של הפנים.
אם שתי תמונות שייכות לאותו אדם, הווקטורים שלהן יהיו קרובים זה לזה.
אם הן שייכות לאנשים שונים, הווקטורים יהיו רחוקים יותר.
שימושים:
- זיהוי אדם לפי תמונה
- השוואה בין שתי תמונות פנים
- חיפוש אדם בתוך מאגר
- מערכת כניסה לפי פנים
- סידור אלבום תמונות לפי אנשים
דוגמה:
|
1 2 3 4 5 |
תמונה A → embedding A תמונה B → embedding B השוואה בין הווקטורים → אותו אדם / לא אותו אדם |
4. Gender and Age Model
מודל זה מקבל פנים ומנסה להעריך:
|
1 2 3 |
מין גיל |
לדוגמה:
|
1 2 |
genderage.onnx → Male, 35 |
שימושים:
- סטטיסטיקה כללית
- ניתוח קהל
- מערכות דמו
- מחקר
- מיון כללי של תמונות
חשוב להבין: זה לא מדויק ב־100%.
הערכת גיל ומין היא חיזוי סטטיסטי, לא עובדה מוחלטת.
5. Face Swap Model
InsightFace כוללת גם שימושים בתחום החלפת פנים, למשל עם מודלים כמו:
|
1 2 |
inswapper_128.onnx |
מודל כזה מקבל פנים מקור ופנים יעד, ומנסה להחליף פנים בתמונה.
שימושים:
- יצירת תוכן
- וידאו ואפקטים
- מחקר
- אפליקציות בידור
חשוב להשתמש בזה בזהירות, עם הסכמה, וללא הטעיה או פגיעה בפרטיות.
חבילות מודלים נפוצות ב־InsightFace
InsightFace מספקת model packs, כלומר חבילות מוכנות של כמה מודלים יחד.
buffalo_l
זו אחת החבילות הנפוצות ביותר.
כוללת בדרך כלל:
|
1 2 3 4 5 6 |
Detection Recognition 2D Landmarks 3D Landmarks Gender & Age |
מתאימה לרוב הפרויקטים.
יתרונות:
- דיוק טוב
- נוחה לשימוש
- יורדת אוטומטית בספרייה
- מתאימה ללמידה ולפיתוח
חסרונות:
- כבדה יותר ממודלים קטנים
- פחות מתאימה למיקרו־בקרים כמו ESP32
buffalo_s
חבילה קטנה ומהירה יותר.
מתאימה כאשר רוצים מהירות גבוהה יותר או מחשב חלש יותר.
שימושים:
- מחשב חלש
- אב־טיפוס מהיר
- הרצה בזמן אמת עם פחות עומס
buffalo_sc
חבילה קטנה מאוד.
מתאימה למשימות בסיסיות יותר.
יתרון מרכזי:
|
1 2 |
קובץ קטן ומהיר |
חיסרון:
|
1 2 |
פחות יכולות מתקדמות |
antelopev2
חבילה כבדה ומדויקת יותר.
מתאימה כאשר חשוב דיוק גבוה יותר בזיהוי פנים.
שימושים:
- מחקר
- מערכות עם מחשב חזק
- השוואת פנים מדויקת יותר
- בדיקות איכות
איך עובד התהליך המלא?
נניח שיש לנו תמונה עם כמה אנשים.
השלב הראשון הוא Detection:
|
1 2 |
תמונה → מציאת כל הפנים |
לאחר מכן:
|
1 2 |
כל פנים → מציאת נקודות פנים |
לאחר מכן:
|
1 2 |
יישור הפנים לפי העיניים והאף |
לאחר מכן:
|
1 2 |
פנים מיושרות → Recognition Model → Embedding |
לבסוף:
|
1 2 |
Embedding → השוואה מול מאגר → שם האדם |
התהליך המלא:
|
1 2 3 4 5 6 7 8 9 10 11 12 13 14 |
Camera/Image ↓ Face Detection ↓ Landmarks ↓ Face Alignment ↓ Embedding ↓ Face Matching ↓ Identity / Unknown |
דוגמה בסיסית בפייתון
|
1 2 3 4 5 6 7 8 9 10 11 12 13 14 15 16 17 18 19 |
import cv2 from insightface.app import FaceAnalysis app = FaceAnalysis(name="buffalo_l") app.prepare(ctx_id=-1) # CPU img = cv2.imread("image.jpg") faces = app.get(img) print("Number of faces:", len(faces)) for face in faces: print("bbox:", face.bbox) print("score:", face.det_score) print("age:", face.age) print("gender:", face.gender) print("embedding shape:", face.embedding.shape) |
מה מחזיר האובייקט face?
כאשר מריצים:
|
1 2 |
faces = app.get(img) |
מקבלים רשימה של פנים.
כל פנים יכולה להכיל:
|
1 2 3 4 5 6 7 8 9 |
bbox — מיקום הפנים בתמונה det_score — ביטחון הזיהוי kps — נקודות בסיסיות landmark_2d_106 — נקודות פנים דו־ממדיות landmark_3d_68 — נקודות פנים תלת־ממדיות embedding — וקטור לזיהוי אדם age — גיל משוער gender — מין משוער |
שימוש רק בזיהוי פנים
אם רוצים רק למצוא פנים ולא להפעיל את כל המודלים:
|
1 2 3 4 5 6 7 8 9 10 |
from insightface.app import FaceAnalysis app = FaceAnalysis( name="buffalo_l", allowed_modules=["detection"] ) app.prepare(ctx_id=-1) faces = app.get(img) |
זה מהיר יותר כי נטען רק מודל detection.
שימוש רק בזיהוי אדם
אם רוצים לזהות מי האדם, צריך לפחות:
|
1 2 3 |
Detection Recognition |
בפועל כדאי גם להשתמש ב־Landmarks כדי ליישר את הפנים לפני יצירת embedding.
שימושים מעשיים של InsightFace
1. מערכת נוכחות
מצלמה מצלמת אדם בכניסה.
המערכת מזהה פנים, יוצרת embedding, ומשווה מול מאגר עובדים.
|
1 2 |
תמונה → embedding → השוואה מול עובדים → זוהה / לא זוהה |
2. פתיחת דלת לפי פנים
אפשר להשתמש בזיהוי פנים כדי לזהות משתמש מורשה.
חשוב להוסיף מנגנון אבטחה נוסף, למשל כרטיס, סיסמה או liveness detection.
3. סידור אלבום תמונות
אפשר לסרוק תיקיית תמונות ולחלק את התמונות לפי אנשים.
|
1 2 |
תמונות רבות → embeddings → clustering → קבוצות לפי אדם |
4. חיפוש אדם במאגר
נותנים תמונה אחת של אדם, והמערכת מחפשת תמונות דומות במאגר.
|
1 2 |
Query face → embedding → search in database |
5. ניתוח וידאו
אפשר להריץ את InsightFace על פריימים מווידאו:
|
1 2 |
Video frame → detect faces → recognize people |
6. בדיקות מחקר
אפשר להשתמש ב־InsightFace כדי ללמוד:
- איך עובד embedding
- איך משווים וקטורים
- איך בונים מערכת זיהוי פנים
- איך משלבים ONNX Runtime בפרויקט AI
האם InsightFace מתאים ל־ESP32?
בדרך כלל לא.
המודלים של InsightFace, במיוחד buffalo_l ו־antelopev2, כבדים מדי למיקרו־בקרים כמו ESP32 רגיל.
הם מתאימים יותר ל:
|
1 2 3 4 5 6 7 |
PC Laptop Server Raspberry Pi חזק Jetson Linux Embedded |
ל־ESP32 עדיף להשתמש במודלים קטנים מאוד כמו TinyML, או לבצע את הזיהוי במחשב/שרת ולשלוח רק את התמונה או הנתונים מה־ESP32.
האם אפשר להריץ InsightFace ב־C או C++?
כן, אבל לא דרך FaceAnalysis של פייתון.
ב־C/C++ אפשר להריץ את קבצי ONNX ישירות בעזרת ONNX Runtime, אבל צריך לבנות לבד:
|
1 2 3 4 5 6 7 8 |
טעינת תמונה preprocessing הרצת המודל postprocessing NMS landmarks embedding comparison |
בפייתון זה פשוט יותר כי FaceAnalysis עושה את רוב העבודה לבד.
נקודה חשובה: פרטיות ורישוי
זיהוי פנים הוא תחום רגיש.
לפני שימוש במערכת כזאת במוצר אמיתי, חשוב לבדוק:
- האם יש הסכמה של האנשים המצולמים
- איפה נשמרות התמונות
- איפה נשמרים ה־embeddings
- האם השימוש חוקי במדינה שלך
- האם מותר להשתמש במודלים למטרה מסחרית
בנוסף, הקוד של InsightFace פתוח, אבל חלק מהמודלים המוכנים מוגבלים לשימוש מחקרי לא־מסחרי, אלא אם מקבלים רישיון מתאים.
סיכום
InsightFace היא מערכת חזקה מאוד לניתוח וזיהוי פנים.
היא בנויה מכמה תתי־מודלים:
|
1 2 3 4 5 6 |
Detection → מציאת פנים Landmarks → נקודות פנים Recognition → embedding וזיהוי אדם Gender & Age → הערכת גיל ומין Face Swap → החלפת פנים |
הכוח של InsightFace הוא שהיא מחברת את כל השלבים האלו לממשק פשוט:
|
1 2 |
faces = app.get(img) |
מאחורי שורה אחת כזאת פועלים כמה מודלי AI שונים.
לכן InsightFace מתאימה מאוד ללימוד, מחקר, אב־טיפוס, מערכות זיהוי פנים, אלבומי תמונות חכמים, חיפוש פנים, ומערכות ראייה ממוחשבת מתקדמות.
מה זה ONNX ולמה משתמשים בו במודלים של בינה מלאכותית?
כאשר בונים מערכת בינה מלאכותית, בדרך כלל יש שני שלבים מרכזיים: שלב האימון ושלב ההרצה.
בשלב האימון המודל לומד מתוך דאטה. בשלב ההרצה המודל כבר מוכן, ומקבל קלט חדש כדי לתת תחזית או החלטה.
לדוגמה:
|
1 2 |
תמונה → מודל AI → זיהוי פנים |
או:
|
1 2 |
תמונה → מודל CNN → חתול / כלב / רכב / אדם |
כאן נכנס לתמונה פורמט חשוב מאוד שנקרא ONNX.
מה זה ONNX?
ONNX הוא קיצור של:
|
1 2 |
Open Neural Network Exchange |
כלומר: פורמט פתוח להעברת מודלים של בינה מלאכותית בין מערכות שונות.
במילים פשוטות, ONNX הוא כמו “קובץ אריזה” למודל AI מוכן.
אפשר לאמן מודל ב־TensorFlow או PyTorch, ואז להמיר אותו לקובץ:
|
1 2 |
model.onnx |
לאחר מכן אפשר להריץ את המודל הזה בלי סביבת האימון המקורית.
מה ההבדל בין TensorFlow לבין ONNX?
TensorFlow הוא Framework לבנייה, אימון והרצה של מודלים.
ONNX הוא לא Framework לאימון, אלא פורמט לשמירת מודל מוכן.
| נושא | TensorFlow | ONNX |
|---|---|---|
| בניית מודל | כן | לא |
| אימון מודל | כן | לא |
| שמירת מודל מוכן | כן | כן |
| הרצת מודל | כן | כן, עם ONNX Runtime |
| מתאים למוצר סופי | כן, אבל כבד יותר | כן, קל ונייד יותר |
| שפת הרצה | בעיקר Python, C++, ועוד | Python, C, C++, C#, Java ועוד |
מה זה ONNX Runtime?
ONNX הוא הקובץ של המודל.
ONNX Runtime הוא המנוע שמריץ את המודל.
הזרימה נראית כך:
|
1 2 |
model.onnx → ONNX Runtime → Prediction |
לדוגמה:
|
1 2 |
image.jpg → face_model.onnx → נמצאו 2 פנים |
למה לא להריץ תמיד ישירות מ־TensorFlow?
אפשר להריץ מודל ישירות מ־TensorFlow, וזה עובד טוב מאוד.
אבל במוצר אמיתי לפעמים רוצים משהו קל יותר, מהיר יותר ונוח יותר להפצה.
למשל:
|
1 2 3 4 5 6 7 |
שרת תוכנת C++ מערכת Embedded Raspberry Pi מצלמה חכמה מערכת Edge AI |
במקרים כאלה ONNX Runtime יכול להיות פתרון נוח מאוד, כי הוא מאפשר להריץ מודל מוכן בלי כל סביבת האימון של TensorFlow או PyTorch.
דוגמה מעולם זיהוי פנים: InsightFace
ספריית InsightFace משתמשת במודלים מוכנים בפורמט ONNX.
כאשר כותבים בפייתון:
|
1 2 |
from insightface.app import FaceAnalysis |
הספרייה יכולה לטעון מודלים כמו:
|
1 2 3 4 5 |
det_10g.onnx → זיהוי פנים בתמונה w600k_r50.onnx → יצירת embedding לזיהוי אדם genderage.onnx → הערכת גיל ומין 2d106det.onnx → נקודות פנים |
כל מודל אחראי על פעולה אחרת.
לדוגמה, מודל detection מקבל תמונה ומחזיר קופסאות סביב הפנים:
|
1 2 |
תמונה → det_10g.onnx → bbox של הפנים |
דוגמה בסיסית:
|
1 2 3 4 5 6 7 8 9 10 11 12 13 14 15 |
import cv2 from insightface.app import FaceAnalysis app = FaceAnalysis(name="buffalo_l") app.prepare(ctx_id=-1, det_size=(640, 640)) # CPU img = cv2.imread("image.jpg") faces = app.get(img) print("Number of faces:", len(faces)) for face in faces: print("Face box:", face.bbox) print("Detection score:", face.det_score) |
במקרה הזה, המשתמש לא מאמן מודל חדש.
הוא משתמש במודל מוכן שכבר אומן מראש.
דוגמה עם רשת CNN פשוטה
נניח שאימנו רשת CNN שמזהה האם בתמונה יש חתול או כלב.
בשלב האימון:
|
1 2 |
תמונות חתולים וכלבים → CNN → אימון → model.keras |
לאחר שהמודל מוכן, אפשר להמיר אותו ל־ONNX:
|
1 2 |
model.keras → model.onnx |
ואז להריץ אותו במוצר:
|
1 2 |
תמונה חדשה → model.onnx → חתול / כלב |
דוגמה רעיונית לרשת CNN:
|
1 2 3 4 5 6 7 8 9 10 11 12 13 14 |
import tensorflow as tf model = tf.keras.Sequential([ tf.keras.layers.Conv2D(16, (3, 3), activation="relu", input_shape=(64, 64, 3)), tf.keras.layers.MaxPooling2D(), tf.keras.layers.Conv2D(32, (3, 3), activation="relu"), tf.keras.layers.MaxPooling2D(), tf.keras.layers.Flatten(), tf.keras.layers.Dense(64, activation="relu"), tf.keras.layers.Dense(2, activation="softmax") ]) |
הרשת הזאת יכולה ללמוד לסווג תמונות לשתי מחלקות.
אחרי האימון אפשר לשמור את המודל ולהמיר אותו ל־ONNX:
|
1 2 3 4 |
pip install tf2onnx onnxruntime python -m tf2onnx.convert --keras model.keras --output model.onnx --opset 17 |
לאחר ההמרה, אפשר להריץ את המודל עם ONNX Runtime:
|
1 2 3 4 5 6 7 8 9 10 11 12 13 |
import onnxruntime as ort import numpy as np session = ort.InferenceSession("model.onnx") input_name = session.get_inputs()[0].name x = np.random.randn(1, 64, 64, 3).astype(np.float32) output = session.run(None, {input_name: x}) print(output) |
למה ONNX חשוב? (והקשר ל דוגמה מעולם זיהוי פנים: InsightFace )
ONNX חשוב כי הוא מפריד בין שלב האימון לשלב ההפצה.
בשלב האימון אפשר להשתמש בכלים חזקים כמו:
|
1 2 3 4 |
TensorFlow PyTorch Keras |
אבל בשלב ההרצה אפשר להשתמש בקובץ ONNX קל ונוח יותר:
|
1 2 |
model.onnx |
זה מאפשר לקחת מודל שאומן במחשב אחד, ולהריץ אותו במחשב אחר, בשפה אחרת, או במערכת קטנה יותר.
סיכום
ONNX הוא פורמט פתוח למודלים מוכנים של בינה מלאכותית.
הוא לא מחליף את TensorFlow או PyTorch בשלב האימון, אלא עוזר בשלב ההרצה וההפצה.
הדרך הנפוצה היא:
|
1 2 3 4 5 6 7 8 |
אימון ב־TensorFlow או PyTorch ↓ שמירה או המרה ל־ONNX ↓ הרצה עם ONNX Runtime ↓ שימוש במוצר אמיתי |
במערכות כמו זיהוי פנים, מצלמות חכמות, רובוטיקה, שרתי AI ומערכות Edge, שימוש ב־ONNX יכול להפוך את המודל לנייד, מהיר ונוח יותר להרצה.
תרגיל כיתה 1
- צור קוד לקולאב בוא טענים תמונה מה PC 1 ותמונה PC 2 ומשווה בין שתי התמונות
- בנה קוד בקולאב שמחפש תמונה בתוך תמונה 0 טען תמונה לחיפוש ותמונה בא מחפשים את הפנים צור כתוב אם התמונה נמצא או לא
- בקולאב – מקבלת תמונה ומטשטשטת בשחור את כל הפנים שיש בתמונה בנה בעזרת מודל InsightFace
- בנה בעזרת a,i studio אפליקציה מבוססת InsightFace
|
1 2 3 |
Face Embedding Comparison with InsightFace + Visualization This program compares embeddings (numerical fingerprints) of faces and shows similarity both as numbers and in a side-by-side image view |
|
1 2 3 4 5 6 7 8 9 10 11 12 13 14 15 16 17 18 19 20 21 22 23 24 25 26 27 28 29 30 31 32 33 34 35 36 37 38 39 40 41 42 43 44 45 46 47 48 49 50 51 52 53 54 55 56 57 58 59 60 61 62 63 64 65 66 67 68 69 70 71 72 73 74 75 76 77 78 79 80 81 82 83 |
# -*- coding: utf-8 -*- """ Face Embedding Comparison with InsightFace + Visualization This program compares embeddings (numerical fingerprints) of faces and shows similarity both as numbers and in a side-by-side image view. """ import cv2 import numpy as np from insightface.app import FaceAnalysis # ====================================================== # 1) Load the InsightFace model # ====================================================== app = FaceAnalysis(name="buffalo_l") app.prepare(ctx_id=-1, det_size=(640, 640)) # CPU only # ====================================================== # 2) Load images # ====================================================== img1 = cv2.imread(r"d:\temp\trump1.jpeg") img2 = cv2.imread(r"d:\temp\trump2.jpeg") if img1 is None or img2 is None: raise FileNotFoundError("Could not open one of the images.") # ====================================================== # 3) Detect and encode faces # ====================================================== faces1 = app.get(img1) faces2 = app.get(img2) if len(faces1) == 0 or len(faces2) == 0: raise ValueError("No face detected in one of the images.") emb1 = faces1[0].embedding emb2 = faces2[0].embedding # ====================================================== # 4) Cosine similarity # ====================================================== def cosine_similarity(a, b): return np.dot(a, b) / (np.linalg.norm(a) * np.linalg.norm(b)) similarity = cosine_similarity(emb1, emb2) print(f"Cosine similarity: {similarity:.4f}") # ====================================================== # 5) Make a decision # ====================================================== threshold = 0.35 if similarity > threshold: decision_text = "SAME PERSON" else: decision_text = "DIFFERENT PERSONS" print("Decision:", decision_text) # ====================================================== # 6) Visualization # ====================================================== # Resize both images to same height for side-by-side display h = 300 img1_resized = cv2.resize(img1, (int(img1.shape[1] * h / img1.shape[0]), h)) img2_resized = cv2.resize(img2, (int(img2.shape[1] * h / img2.shape[0]), h)) # Place images next to each other combined = np.hstack((img1_resized, img2_resized)) # Write similarity score and decision on top cv2.putText(combined, f"Similarity: {similarity:.2f}", (10, 30), cv2.FONT_HERSHEY_SIMPLEX, 1.0, (0, 255, 0), 2) cv2.putText(combined, decision_text, (10, 70), cv2.FONT_HERSHEY_SIMPLEX, 1.0, (0, 255, 0) if similarity > threshold else (0, 0, 255), 2) # Save and show result output_path = r"d:\temp\face_compare.jpg" cv2.imwrite(output_path, combined) print(f"Visualization saved at: {output_path}") cv2.imshow("Face Comparison", combined) cv2.waitKey(0) cv2.destroyAllWindows() |
|
1 2 3 4 5 6 7 8 9 10 11 12 13 14 15 16 17 18 19 20 21 22 23 24 25 26 27 28 29 30 31 32 33 34 35 36 37 38 39 40 41 42 43 44 45 46 47 48 49 50 51 52 53 54 55 56 57 58 59 60 61 |
# -*- coding: utf-8 -*- """ Created on Sun Sep 21 03:44:30 2025 @author: dev66 """ import sys print(sys.executable) import cv2 import numpy as np from insightface.app import FaceAnalysis # ====================================================== # 1) Load the InsightFace model # ====================================================== # "buffalo_l" = strong recognition model, works well for face embeddings app = FaceAnalysis(name="buffalo_l") app.prepare(ctx_id=-1, det_size=(640, 640)) # ctx_id=-1 = CPU, 0 = GPU # ====================================================== # 2) Load two face images # ====================================================== img1 = cv2.imread(r"d:\temp\trump1.jpeg") img2 = cv2.imread(r"d:\temp\trump1.jpeg") if img1 is None or img2 is None: raise FileNotFoundError("Could not open one of the images.") # ====================================================== # 3) Detect and encode faces # ====================================================== faces1 = app.get(img1) faces2 = app.get(img2) if len(faces1) == 0 or len(faces2) == 0: raise ValueError("No face detected in one of the images.") embedding1 = faces1[0].embedding embedding2 = faces2[0].embedding print("Embedding shape:", embedding1.shape) # ====================================================== # 4) Cosine similarity function # ====================================================== def cosine_similarity(a, b): return np.dot(a, b) / (np.linalg.norm(a) * np.linalg.norm(b)) similarity = cosine_similarity(embedding1, embedding2) print(f"Cosine similarity: {similarity:.4f}") # ====================================================== # 5) Decision # ====================================================== threshold = 0.35 # typical threshold range: 0.3 - 0.5 if similarity > threshold: print("Result: SAME person") else: print("Result: DIFFERENT persons") |
Face Comparison with InsightFace
:embedding vector
mbedding Vector?
-
An embedding is just a list of numbers.
-
These numbers describe the important features of a face (shape of nose, distance between eyes, jawline, etc.).
-
The list is usually long (for InsightFace, often 512 numbers).
-
Together, those numbers create a unique “fingerprint” of the face.
Why is it useful?
-
The raw image (like 100×100 pixels = 10,000 numbers) is too big to compare directly.
-
The embedding reduces this to 512 numbers that keep only the most important face features.
-
Two embeddings from the same person will look very similar.
-
Two embeddings from different people will look very different.
Simple Example
Think of it like describing a person in short words:
-
Instead of writing a full biography, you say:
-
Height: 1.8
-
Hair: 0.3
-
Skin tone: 0.7
-
Nose: 0.5
-
Smile: 0.9
-
This short list is the embedding vector.
It’s not the full photo, but enough to recognize who it is.
This example shows how to use InsightFace to compare two face images and decide if they belong to the same person. The program uses cosine similarity between face embeddings.
|
1 2 3 4 5 6 7 8 9 10 11 12 |
from insightface.app import FaceAnalysis import cv2 app = FaceAnalysis(name="buffalo_l") app.prepare(ctx_id=-1, det_size=(640, 640)) img = cv2.imread(r"d:\temp\trump1.jpeg") faces = app.get(img) embedding = faces[0].embedding print("Length of embedding vector:", len(embedding)) print("First 10 values:", embedding) |

Explanation
-
512 numbers total → this is the embedding vector.
-
Each number captures some hidden feature of the face.
-
The exact meaning of each number is not human-readable (like “eye width” or “nose length”), but together they form the face fingerprint.
When comparing two faces, InsightFace checks how close these 512-number fingerprints are, usually using cosine similarity.
Step 1 – Imports and setup
import cv2
import numpy as np
from insightface.app import FaceAnalysis
-
sys.executableprints the Python path in use. -
cv2is OpenCV for handling images. -
numpyis used for math. -
FaceAnalysisis the InsightFace tool for detection and embeddings.
Step 2 – Load the InsightFace model
-
buffalo_lis a strong pre-trained face recognition model. -
ctx_id=-1forces CPU usage. -
det_size=(640,640)sets the detection image size.
Step 3 – Load two images
if img1 is None or img2 is None:
raise FileNotFoundError("Could not open one of the images.")
-
Loads the two face images from disk.
-
Raises an error if any image cannot be read.
Step 4 – Detect and encode faces
if len(faces1) == 0 or len(faces2) == 0:
raise ValueError("No face detected in one of the images.")
embedding1 = faces1[0].embedding
embedding2 = faces2[0].embedding
print("Embedding shape:", embedding1.shape)
-
Detects faces in both images.
-
Each face object contains bounding box, landmarks, and a 512-dimensional embedding.
-
Here we take the first detected face.
Step 5 – Cosine similarity function
similarity = cosine_similarity(embedding1, embedding2)
print(f"Cosine similarity: {similarity:.4f}")
-
Cosine similarity measures the angle between two vectors.
-
Value close to 1.0 means the faces are very similar.
-
Value near 0.0 means no relation.
Step 6 – Decision
-
If similarity is above the threshold, the images are considered the same person.
-
Threshold can be tuned (typical range: 0.3–0.5).
How it works
-
InsightFace detects and aligns the face.
-
It encodes the face into a vector of 512 numbers (the embedding).
-
Cosine similarity compares how close two vectors are.
-
If the vectors are close enough, the faces are the same person.
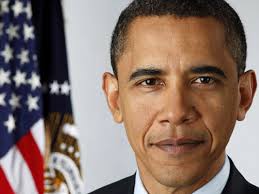
compares Trump1, Trump2, and Obama embeddings, and rewrite it with step-by-step remarks so even someone new can follow
|
1 2 3 4 5 6 7 8 9 10 11 12 13 14 15 16 17 18 19 20 21 22 23 24 25 26 27 28 29 30 31 32 33 34 35 36 37 38 39 40 41 42 43 44 45 46 47 48 49 50 51 52 53 54 55 56 57 58 59 60 61 62 63 64 65 66 67 68 69 70 71 72 73 74 75 76 77 78 79 80 81 82 83 84 85 86 87 88 89 90 91 |
# -*- coding: utf-8 -*- """ Face Embedding Comparison with InsightFace This program compares embeddings (numerical fingerprints) of faces and shows how similar or different they are. """ import cv2 import numpy as np from insightface.app import FaceAnalysis # ====================================================== # 1) Load the InsightFace model # ====================================================== # "buffalo_l" = a strong pre-trained model for face recognition. # ctx_id=-1 means we use CPU. If you have a GPU, use ctx_id=0. # det_size is the input resolution for detection (640x640 is good default). app = FaceAnalysis(name="buffalo_l") app.prepare(ctx_id=-1, det_size=(640, 640)) # ====================================================== # 2) Load three images # ====================================================== # Trump1 and Trump2 should be two different images of the same person. # Obama1 should be an image of another person for comparison. img1 = cv2.imread(r"d:\temp\trump1.jpeg") img2 = cv2.imread(r"d:\temp\trump2.jpeg") img3 = cv2.imread(r"d:\temp\obama1.jpeg") if img1 is None or img2 is None or img3 is None: raise FileNotFoundError("Could not open one of the images. Check paths!") # ====================================================== # 3) Detect faces and compute embeddings # ====================================================== # app.get(image) finds faces and returns information (bounding box, embedding, etc.) faces1 = app.get(img1) faces2 = app.get(img2) faces3 = app.get(img3) # Check that a face was actually found if len(faces1) == 0 or len(faces2) == 0 or len(faces3) == 0: raise ValueError("No face detected in one of the images.") # Each face object has an "embedding" = a 512-number vector (the face fingerprint). emb1 = faces1[0].embedding emb2 = faces2[0].embedding emb3 = faces3[0].embedding # ====================================================== # 4) Print part of the embeddings # ====================================================== # We print only the first 10 numbers for readability. print("Trump1 embedding (first 10 numbers):", emb1[:10]) print("Trump2 embedding (first 10 numbers):", emb2[:10]) print("Obama embedding (first 10 numbers):", emb3[:10]) # ====================================================== # 5) Define cosine similarity # ====================================================== # Cosine similarity checks the angle between two vectors. # If they point in the same direction → similarity ~ 1.0 → same person. # If they point in different directions → similarity ~ 0.0 → different people. def cosine_similarity(a, b): return np.dot(a, b) / (np.linalg.norm(a) * np.linalg.norm(b)) # ====================================================== # 6) Compare embeddings # ====================================================== sim_12 = cosine_similarity(emb1, emb2) # Trump1 vs Trump2 sim_13 = cosine_similarity(emb1, emb3) # Trump1 vs Obama print("\nCosine similarity Trump1 vs Trump2:", sim_12) print("Cosine similarity Trump1 vs Obama :", sim_13) # ====================================================== # 7) Make a decision # ====================================================== # Typical threshold is between 0.3 - 0.5 # (depends on dataset and how strict you want matching to be). threshold = 0.35 if sim_12 > threshold: print("Trump1 vs Trump2: SAME person") else: print("Trump1 vs Trump2: DIFFERENT persons") if sim_13 > threshold: print("Trump1 vs Obama: SAME person") else: print("Trump1 vs Obama: DIFFERENT persons") |
תרגיל כיתה 1